Preparing an Authorware Piece for Web Delivery
OK. So you have completed an Authorware piece and want to put it "on the
Web." We'll leave aside the obvious things, such as needing to have some
server space on the Web and needing to have an FTP program for uploading the
piece.
Beyond those things, here's how to do it!
Step 1) Be sure that your ISP (Internet Service Provider) or webmaster (if you have a "captive" server administrator) has enabled the "proper mime types" for your piece. Here is the file type info that she will need:
AddType application/x-authorware-map
aam
AddType application/x-authorware-seg
aas
AddType application/x-authorware-bin
aab
OR, if you have the proper access, add a file named ".htaccess" (without the quotation marks) to your "root folder" on your website. It should be a plain text file and should contain exactly the text given in the three lines above.. Note: this works for Unix servers -- if anyone knows the routine for other servers, please let me know!
Step 2) Package your Authorware piece "without runtime" and create a new folder for the web-packaged files (not absolutely necessary to have a new folder, but it'll save come confusion when you are ready to upload the whole thing to your server!)
Step 3) Locate the "Afterburner" file in your Authorware folder: for AW3, it is ab16a.exe and for AW 4 and 5, it is ab32a.exe (NOTE: the AW 4 and 5 "afterburners" are totally different, even though they share the same filename. They will not work for the "other" version !)
Step 4) Start the "afterburner" software. You'll see the following:

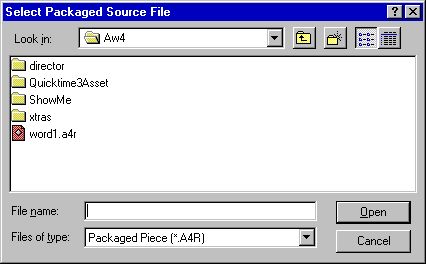
Navigate to the location of your packaged AW piece and select it. You'll see the following:
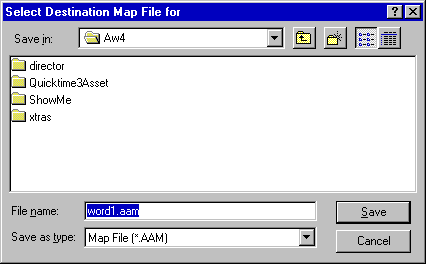
Now you'll need to navigate to
the new folder that you created for the "shocked" files, select that
folder, and select a name for your Map file (.aam) This is the file that will
be "called" by the HTML document that you create for the piece. You'll
see:
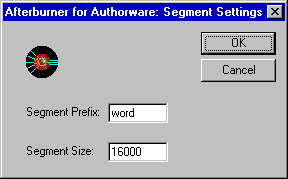
The name that you insert for the "segment prefix" is not terribly
important, but the "segment size" can be. This number determines (somewhat)
the file size into which Afterburner "breaks up" your file for Internet
delivery. For slow Internet connections (everybody's!) select a small segment
size (8000 or so.) But realize that AW will not always respect your selection!
If single elements of a piece (ie a really large graphic file) are larger than
the segment size you select, those elements will have larger segments. (I
did NOT set the sample sizes correctly for the samples shown below, as I had
no intention of placing them on the Web!)
Once you click on "OK" in the above window, Afterburner will process your piece and will show you the following:
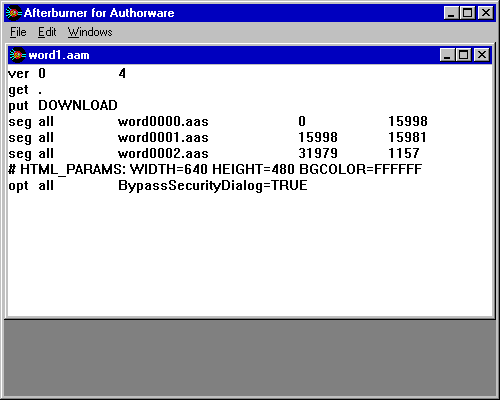
If your piece is a simple one,
the "shocking" part is done. All that is left is to create an appropriate
HTML file and upload the HTML file, the ".aam" file and all of the
".aas" files to your webserver. You can close Afterburner. If you
now navigate to the folder that you created for the piece, you'll see something
like:
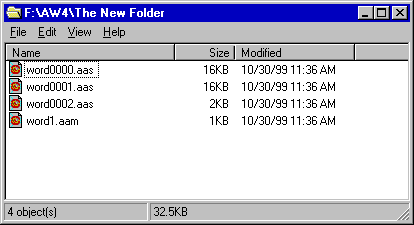
These are the files that you'll upload once you have built the web document
to "call" them.
Step 5) Write the HTML code. You may do anything that you like with the page itself, but in the spot on the page where you'd like the "Macromedia" logo to appear*, insert the following code:
<embed arc="yourfile.aam" align="baseline" border="0" width="120" height="120" window=ontop palette="Background"> (Where yourfile is replaced by your Map file's name.)
You certainly may feel free to play with any of the parameters in this code: as written it opens the AW piece in a new window on top of the browser window and displays a 120X120-pixel "Macromedia" logo on the HTML page.
Save the HTML file: suggestion -- save it in the same folder as the "shocked" AW files, and plan to upload the to the server together in that folder. This will save you some grief later if you build a complicated website!
Step 6) Upload the whole works to the server! With luck, your piece will be ready to run.
|
|